What is Bokashi
It is another option for decomposing organic waste at home. And turning it into a high quality compost base, which can be used to fertilise the plants in our urban garden. Without bad smells, without attracting insects, and in only 2 weeks.
Bokashi or Bocashi, is a Japanese word meaning Fermented Organic Matter. The fermentation process is different to that of traditional composting and vermicomposting. In order to transform these vegetable remains, an inoculum of micro-organisms is applied that activates and accelerates the decomposition process.
There are two different rapid composting processes under the same name of Bokashi, in which different micro-organisms are involved.
The traditional process, which consists of piling organic waste such as rice husks and manure on the ground, to which molasses, minerals and efficient micro-organisms are added. Fermentation takes place aerobically (in the presence of oxygen), and requires daily turning to ensure that air enters.
This results in very high temperatures, higher than with traditional composting or vermicomposting. It is therefore not a viable option in urban spaces, such as balconies and terraces.
In a GreenCity environment, we will use another Bokashi composting process. Que consiste en una fermentación anaeróbica, sin apenas presencia de oxígeno. The organic matter is placed in a small airtight bin, and for each layer of plant debris, a layer of Bokashi inoculum is added.
This inoculum, also known as Bokashi bran, activates the fermentation, due to it being composed of efficient micro-organisms. It then turns the waste into a high quality compost (or digestate) base in as little as 2 weeks.
Read on, this is just a summary of what you need in order to make a good Bocashi for your plants.
Benefits of Bokashi for your plants
Given that it is a product completely colonised by micro-organisms, it is an excellent inoculum for the substrate of your plants.
Facilitates nutrient assimilation
The digestate obtained is completely packed with beneficial micro-organisms, which will help to transform the nutrients in the substrate so that they can be absorbed by the plants. They are essential to the organic nutrition of our plants because, although there may be nutrients in the substrate, without micro-organisms they cannot process them.
It stimulates plant growth
Bokashi also provides enzymes, amino acids, and plant growth regulating compounds. Giving plants what they need, in order to grow at their own pace and be strong and productive.
These micro-organisms are also a great defence, keeping other more aggressive fungi and bacteria at bay, which could be dangerous for the development of the plants and their fruits.
It improves the soil and the substrate
When we add bocashi, we incorporate a large number of micro-organisms that immediately colonise the soil or substrate where it is applied. This creates a biofilm layer that provides the right environment for chemical and microbiological processes to develop more easily.
It also enables soils to remain aerated like sponges, with a good proportion of micro and macropores where water can be retained and be available when the plants need it.
Materials required
Before starting the process of making Bokashi compost, collect the materials that you will need.
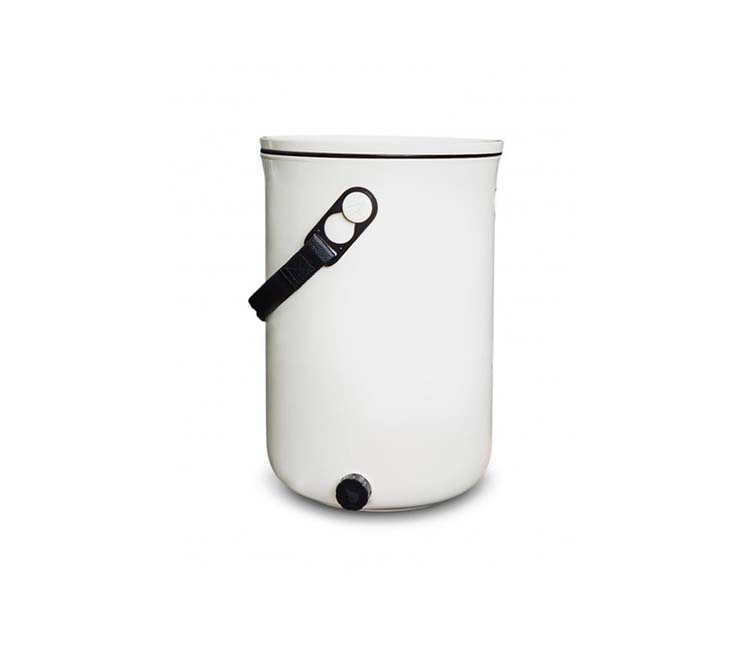
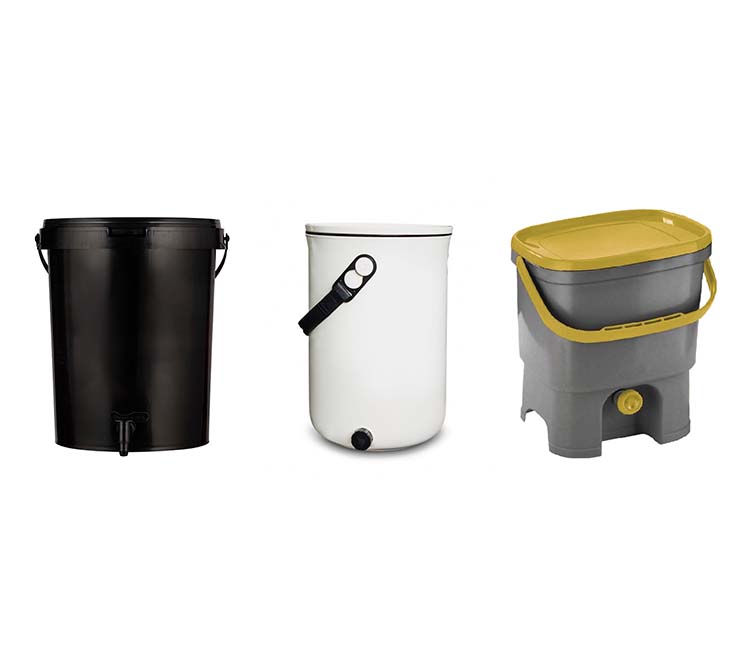
Bokashi composting bin
To carry out this type of composting it is necessary to have a hermetically sealed, unventilated bin with a tap to remove the leachate. There are many options on the market so you can choose the one that best suits your needs.
Pay attention to the materials included in each kit. Some lower-priced options may not include essential items, such as the inner lid, or measuring cups.
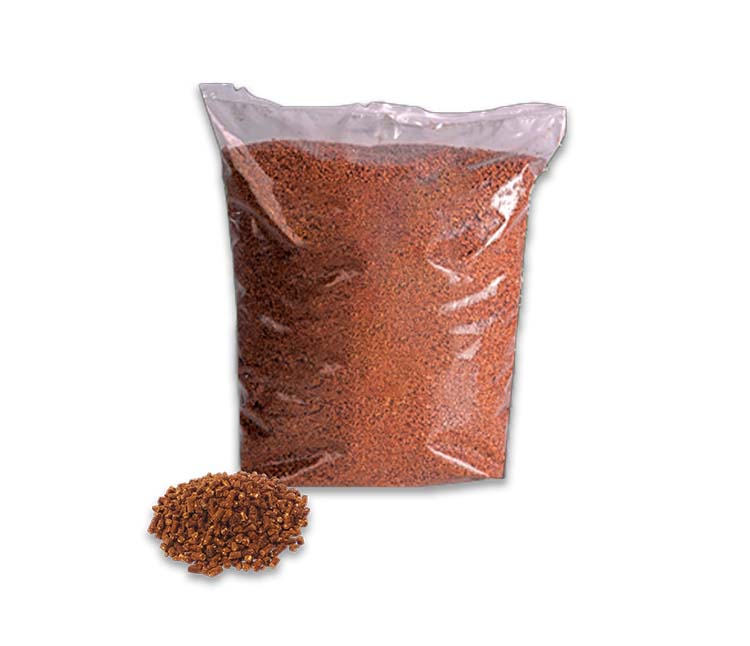
Inoculum of micro-organisms
It is also essential that you have the micro-organisms that will be responsible for the rapid fermentation of the organic matter.
When you buy the bin, the first bag of efficient micro-organisms is usually included. It is a mixture of molasses, bran, and micro-organisms such as: lactic acid bacteria, yeasts, photosynthetic bacteria, actinomycetes and enzymatically active fungi.
They can be inoculated in cereal bran, or sold in granulated form.
Inside lid
Since the fermentation process is airless, it will be more effective if the scraps we introduce are lightly pressed. It is therefore recommended that, after applying the activator, the materials that are introduced be gently pressed down.
If there is no inner lid in the kit, you can press it down with your hand, or use a tool such as a spatula or a slotted spoon.
You can also make a custom-made circle made of wood, to put on top of the leftovers and leave it there as a press (and to reduce the amount of oxygen in the bucket).
Vessel
To collect the liquid produced by the leachate, you will need a small vessel, bottle or container, which fits the dimensions of the tap. Some bins already include it in the kit, but if this is not the case, you will have to obtain one.
Measuring cup
To add the exact amount of inoculum needed. The recommended dose of the activator is usually 20 ml, so that is the volume of the recipient you will need.
If the shape fits the available space around the tap, you can use it for both the application of micro-organisms and for collecting the leachate.
Other optional materials
Freezer container
If you hardly cook at home, and you collect very little organic waste on a daily basis, a good solution may be to freeze it. Choose a container of approximately 1 litre, and put the leftovers in it, freeze, keep filling, freeze… and when it is full, let it thaw, remove the liquid if there is any, and add it to the bucket in the same way as if it were fresh leftovers.
This will prevent rotting and odours.
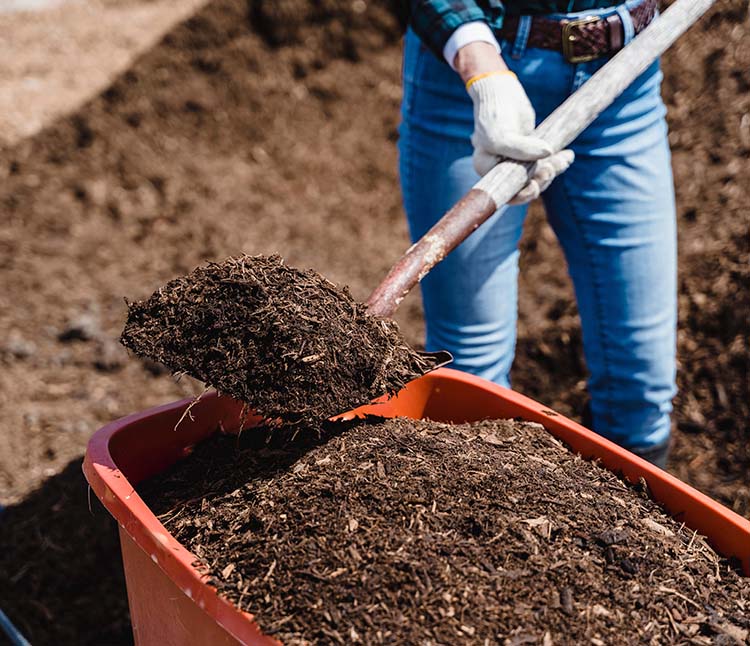
Large box with substrate
If, after the 4 weeks that you need to make pre-compost (digestate), you want to continue the process to transform it into compost, you will have to mix it with more substrate. For this you will need a large container in which to mix the two components.
It is advisable to have a lid to protect it from the sun’s rays, but that allows air to pass through.
Others things to bear in mind
When you start this process, you need to stop and think about two factors that will greatly influence the success of the process.
Choosing the right Bokashi bin
There are many options on the market, and there is sure to be one that fits the dimensions and décor of your kitchen. We definitely recommend that you purchase one of the commercial models, because:
- they are robust, will remain in good condition for a long time, and will not break easily when handled.
- they close securely, they are airtight, which ensures that the process is truly oxygen-free and, therefore, free of rot and odours.
- they have a built-in tap for the collection of leachate.
In addition to choosing the design you like the most, or the one with the most affordable price, the fundamental decision will be the volume of the container.
You will first have to monitor the amount of organic waste generated in your household in around 2 weeks. Since this is the average time in which the Bokashi bucket is usually filled, if we add the chopped scraps daily.
The most common size is between 10 and 16 litres. If you generate a large amount of organic waste, it would be best to get 2 bins. That way, as soon as one is filled, you can seal it, and start filling the other one. Alternating the use of both, without having to wait and accumulating organic matter.
The best place for your Bokashi bin
The best location will be a cool place during the time of the year when temperatures are high. And a warm place when it cools down outside on a daily basis.
It is also recommended to keep it out of direct sunlight, both to prevent the inside temperature from rising too high and to prevent the container material from deteriorating prematurely.
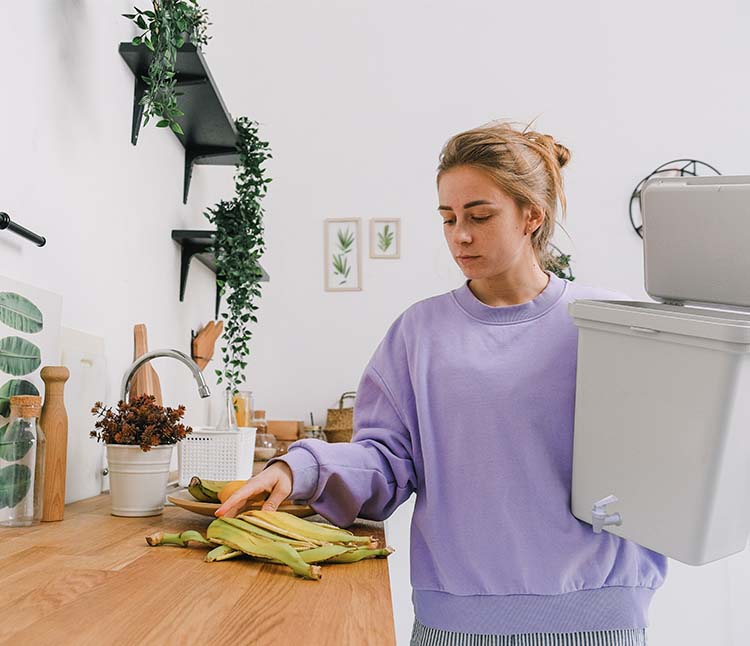
In most houses, the place that best meets these requirements is the kitchen. It also has the advantage of being close to the vegetable waste. There are no bad smells either. So it’s like having an extra recycling tower in your kitchen.
How to make Bokashi compost
Once you have acquired the materials, and already have at least one litre of organic waste, you can start the fermentation process and obtain your own compost in record time.
Fermentation process
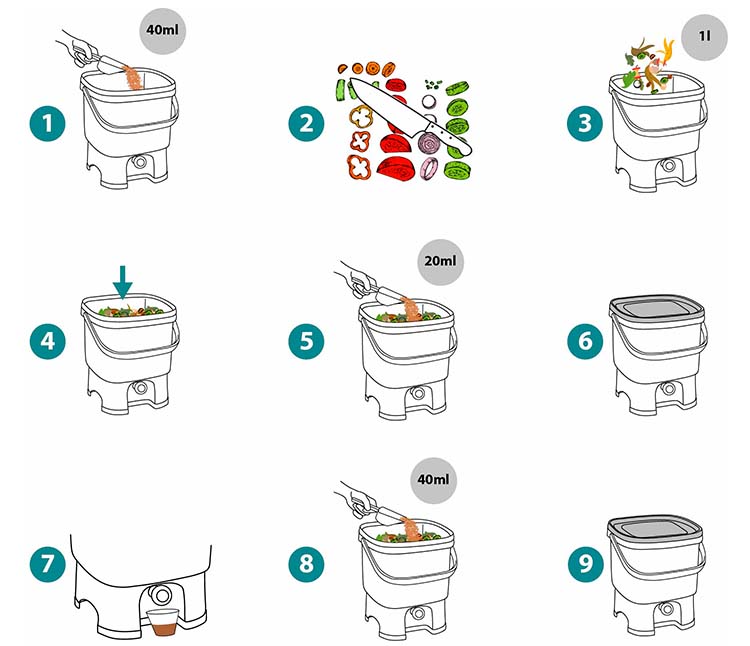
The first step is to check that the tap is in the closed position. That way you will avoid surprises when fermentation starts and the liquid starts to descend.
If this is the first time you are performing the Bokashi fermentation process, you will need to add 40 ml of activator at the bottom of the bin.
If you already have precompost prepared, you can leave a layer on the bottom, and this will act as the inoculum.
A layer of organic waste of approximately 1 litre is then added. This should be cut into small pieces to make the fermentation more efficient.
If the leftovers have been frozen, wait until they are at room temperature before adding them to the bucket. The micro-organisms need a stable temperature to do their job, so a sudden change in temperature could stop or slow down the process.
Spread another 20 ml of Bocashi activator on top. And then press well, to eliminate air pockets.
For every 1 litre layer of organic matter you add, sprinkle 20 ml of efficient micro-organisms on top, and press to let the air out.
Put the lid on, making sure it is tightly sealed. Keep it closed all the time, until you put your waste scraps in the next day. Remember that this is an anaerobic fermentation, so the less air there is, the more efficient the process will be.
The next time you open the bucket, first add the chopped waste and then the 20 ml of activator. And continue in the same way until the container is full.
To finish, sprinkle 40 ml of Bokashi activator, press, and cover.
You will have to wait 2 weeks until the precompost, or digestate, is ready for use.
During the fermentation process, liquids are generated and collected in the lower part of the bin. It is recommended that it be removed via the tap every 3-5 days so that it does not rot and generate unpleasant odours.
After 2 weeks during which time the bin remains closed, open it and check that the process has been successful.
If it has a sweet and sour smell, similar to apple pie, it’s done. If it smells rotten, something has gone wrong, and you won’t be able to use it in your urban garden.
If there is white mould on the top, don’t worry, it is beneficial. But if the mould is black, you will have to throw away the entire contents.
The volume will have decreased by about 25%. And you will see that the organic waste you have added has hardly changed visually, but chemically it has. So in just 3 more weeks, you can have some real compost ready to go.
A little further down I explain how.
What you can put in the bin
Bokashi composting systems allow the addition of many other waste materials that are not suitable for the traditional compost heap or for vermicomposting. It is also not necessary to be exhaustive about the ratio between the carbon and nitrogen input.
Fresh material
- Vegetable, fruit and nut scraps.
- Cooked food
- Meat and fish, raw or cooked.
- Cheese and yoghurt
- Garden waste: prunings and leaves of vegetables, herbs…
Dry material
- Dried plants and leaves, straw, cereal husks
- Paper without dyes, sawdust without chemical treatments.
- Tissues (in small quantities)
Other
- Coffee grounds and tea leaves
- Ash and hair (in small quantities)
- Egg shells
- Bread
Any scraps that are added should be in small pieces, and it is better if fresh and dry matter are mixed together, rather than doing a layer of each one.
What is not recommended to add to the bin
In general, no substances that are bactericidal or fungicidal should be added, as these would decrease the population of micro-organisms and stop the fermentation process.
Also, as it is a fast process, it is not recommended to add excessively hard organic waste, which requires a long composting process. Nor should you add faeces, as the elimination of pathogens, such as E-coli, cannot be guaranteed in such small containers.
Waste to be avoided
- Medicines and chemicals
- Liquids: vinegar, juices, sauces, milk, oil, water…
- Nut and seed shells.
- Bones
- Excrement
How to harvest Bokashi
Solid Bokashi
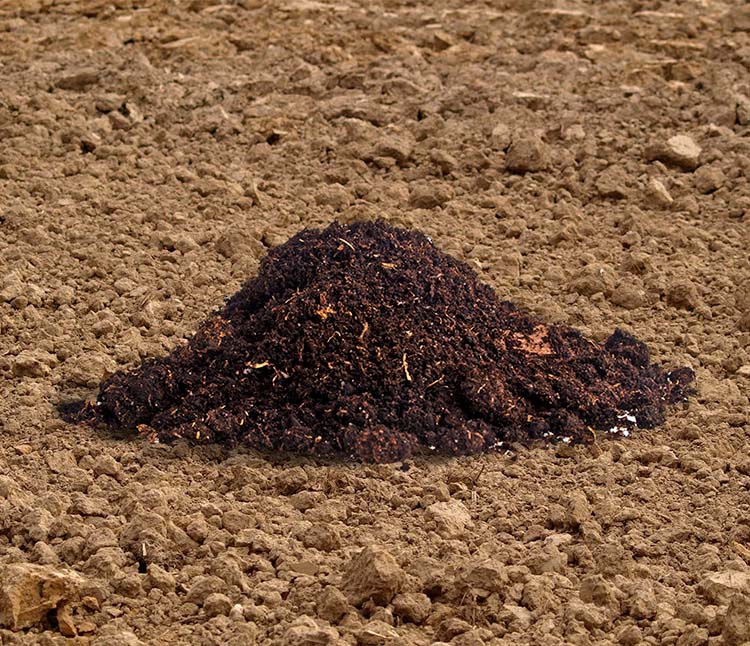
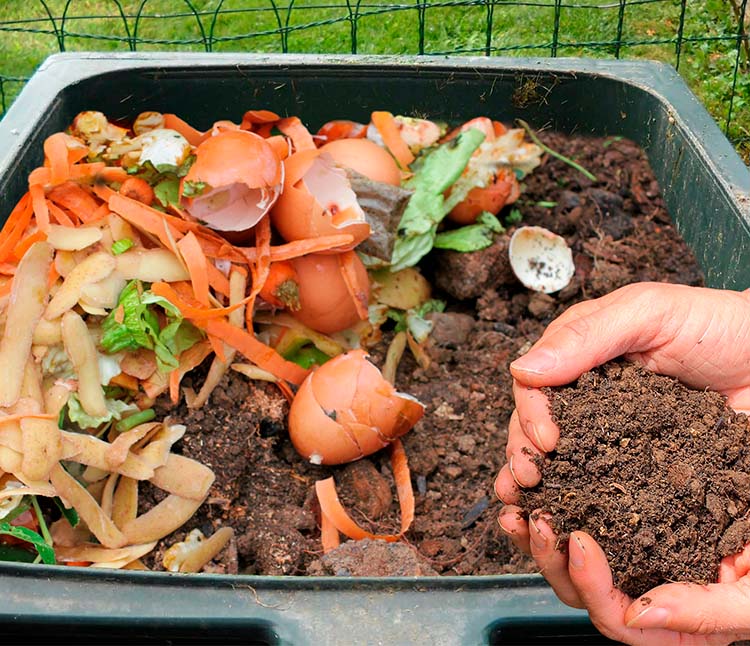
What we obtain after 2 weeks of being sealed, is a pre-compost where the organic waste is colonised by micro-organisms. Only the fermentation phase takes place, where the physical form of the materials we have added will hardly have changed. It is still an early stage of composting, so the waste should not be added directly near the plants.
The next step is to mix the digestate obtained with a similar volume of soil or substrate. You can have a specific box for this purpose, where you can pour the peat or soil leftovers from your pots, and then mix it in with the Bokashi.
The beneficial bacteria will continue to break down the food scraps, and in about 4 weeks you will have a high quality compost, or regenerated substrate, packed with nutrients and micro-organisms.
If you have large planters or containers, you can bury the digestate directly, away from the plants. This will ensure that the roots are not burnt, either by excess nutrients or the increased temperature.
This composting process, after fermentation, is aerobic, so it is advisable to turn the soil with the pre-compost once or twice a week. In addition, for the process to run smoothly, the mixture should be moist at all times.
Bokashi líquid
Depending on how dry or wet the waste was when we added it, and the place we have chosen to keep the Bokashi bin, you may have another harvest, in liquid form: the leachate from the fermentation process.
It is a concentrate of nutrients from vegetable waste, with bacteria, fungi, protozoa, yeast, actinomycetes… In addition to nourishing the plants, it inhibits diseases by increasing the plant’s resistance to infection, and by fighting pathogens for space and food, slowing down or preventing their development.
This leachate should be collected every 2 to 3 days and used as soon as possible to keep the micro-organisms alive.
It is quite concentrated, so if applied undiluted it could damage or upset the balance of the plants. It is best to dilute it by adding 1 litre of water for every 100 ml of leachate.
You can use this dilution to water the substrate and ensure that your containers never lack the micro-organisms they so desperately need.
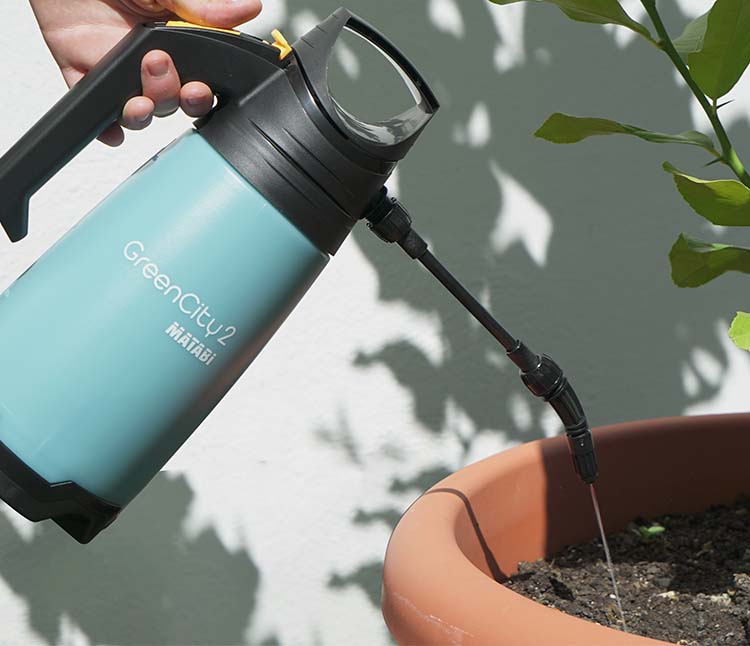
To apply it, take your GreenCity 2 sprayer, fit the filter included, and pour in the 100ml of leachate. Remove the filter, and top up with 1 litre of non-chlorinated water. Shake it a little, put the adjustable nozzle in the open position, apply pressure, and it is ready to be used directly on the substrate.
And, if you have any left over, there is another surprising use for leachate. You can pour it down the drain to clean the pipes and forget all about any bad odours Frequent application of this liquid will cause the micro-organisms to process the organic debris adhering to the pipes, preventing clogging and unpleasant odours.
In this post we wanted to share with you the method of rapid home composting, using the Bokashi technique. So that you can follow it, step by step, and understand the processes that are taking place.
And if what you need is a step-by-step guide to creating your own urban container garden, we’ll give you a full training course with the purchase of any GreenCity sprayer. Choose the one that best suits your needs by clicking on this link https://greencitymatabi.com/en/sprayers/
Have a good harvest!!